AI Travel Blogging Checklist: From Notes to Published Posts
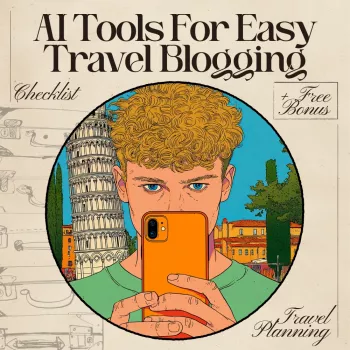
AI Tools for Easy Travel Blogging Checklist (Digital Download)
Travel days create a flood of material—receipts, location pins, half-finished notes, voice memos you can’t remember recording, and photos that blur together by the time you’re home. The difference between “I’ll write that later” and a publish-ready post is usually a repeatable workflow that turns raw capture into clean structure without flattening your personality or skipping the practical details readers rely on.
The AI Tools for Easy Travel Blogging Checklist (digital download) is built for that exact moment: when you have real experiences and real facts, but need a quick path from messy materials to a readable post.
What the checklist helps with
- Convert scattered notes, voice memos, and photos into a structured draft without starting from a blank page.
- Keep destination facts, logistics, and personal observations separated so the post stays accurate and readable.
- Speed up repetitive tasks like formatting, headlines, summaries, and packing practical info into scannable sections.
- Reduce missed details with a step-by-step sequence that can be reused for every trip.
- Maintain a consistent voice by reusing the same input templates and revision steps.
A simple workflow: from capture to publish
1) Capture
Collect raw materials (notes, receipts, location pins, photos, voice recordings) into one folder per day or per place. Naming conventions matter more than fancy apps—use simple labels like “2026-06-Paris-Day2” so later steps move faster.
2) Sort
Split content into three buckets: story moments (what happened), useful logistics (how it worked), and sensory details (sounds, smells, surprises). This separation keeps your writing vivid without mixing opinions into facts like hours, prices, and transit steps.
3) Build the skeleton
Pick a post type—itinerary, neighborhood guide, weekend recap, food guide—and map the sections before drafting. A clear skeleton prevents “diary sprawl” and makes it easier for readers to skim.
4) Draft fast
Use an AI writing tool to turn your outline and verified notes into paragraphs. Short, consistent input templates help you keep control of tone and length while avoiding a generic voice.
5) Verify
Cross-check prices, times, names, and claims against reliable sources and personal records before publishing. If something can change (seasonal hours, ticket rules), save screenshots or link to official pages so you can update quickly later.
6) Polish
Tighten intros, add headings, captions, and internal links, then run readability and grammar checks. The goal is clarity, not perfection—keep the on-the-ground observations that make the trip feel real.
7) Package
Write a short excerpt, create a pin/thumbnail plan, and prepare a simple social caption set. Packaging is often the step that gets skipped; having it baked into the checklist makes publishing feel “finished,” not just posted.
AI tool categories that fit travel blogging tasks
- Writing assistants for drafting sections, transitions, summaries, and alternate intros.
- Transcription tools for turning voice notes into text that can be organized into a post.
- Grammar and readability tools for tightening sentences and reducing repetition.
- Image helpers for captions, alt text, and quick shot lists (without inventing details not captured on the trip).
- Research helpers for brainstorming questions to answer in a guide, then validating facts with primary sources.
Common travel blogging tasks and helpful AI tool types
| Task | Best-fit tool type | What to prepare before using it | Accuracy check to do after |
|---|---|---|---|
| Turn raw notes into an outline | Writing assistant | Bullet list of places + highlights + audience (solo, family, budget, luxury) | Confirm the sequence matches the actual trip days/locations |
| Convert voice memos to text | Transcription tool | Clear audio file names by date/location | Spot-check proper nouns (streets, museums, restaurants) |
| Write practical sections (getting there, costs, timing) | Writing assistant + formatting aid | Your numbers, links, and constraints (season, day of week) | Verify hours/prices with official sites or saved receipts |
| Create captions and alt text | Image helper | What’s actually in the photo + context (where/when) | Ensure no extra claims or incorrect location names |
| Edit for clarity and consistency | Grammar/readability tool | Style notes (short sentences, friendly tone, no fluff) | Read aloud; ensure personal voice and real observations remain |
Input templates that turn travel notes into real paragraphs
Quality and ethics checks before hitting publish
- Fact-check every concrete claim (hours, prices, rules, distances) using official sites, saved screenshots, or receipts.
- Avoid unverified safety, legal, or health advice; link to official guidance when relevant.
- Disclose affiliate relationships and sponsorships clearly and close to the recommendation (see the Federal Trade Commission’s Endorsements Guides).
- Respect privacy: remove faces/identifiers unless consent was given; be careful with children and private residences.
- Copyright and licensing: only use photos, maps, and text you own or are licensed to use; keep references to official guidance like the U.S. Copyright Office’s AI material guidance and review license terms such as Creative Commons licenses when applicable.
How to use the digital checklist in a weekly routine
Digital download: what’s included and who it fits
For travelers who publish safety-focused destination planning alongside personal stories, pair it with Safe Countries for Independent Travelers (digital eBook) to keep guidance organized and reader-friendly.
FAQ
Can AI help write travel posts without making things up?
Yes, when you provide a tight set of verified facts and direct it to use only what you supply. Finish with a verification pass for names, hours, prices, and any concrete claims.
What should be prepared before using AI on travel notes?
Prepare a short section plan, a facts panel (dates, places, prices, transit lines), a handful of sensory moments, and the post type plus intended audience. This keeps the draft grounded in what actually happened.
Does using AI change how disclosures or copyright work?
No—affiliate and sponsorship disclosures still apply, and copyright/licensing rules still matter for photos and quoted material. Keep sources, permissions, and any licensing records organized alongside your trip notes.


Leave a comment