Furniture Placement Basics: Simple Layouts for Better Flow
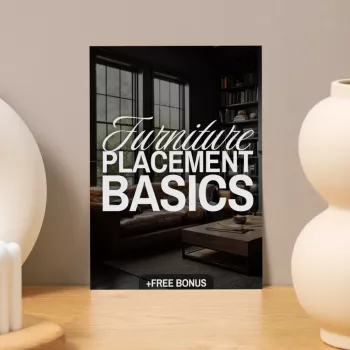
Furniture Placement Basics: Easy Room Layouts That Improve Flow and Comfort
Good furniture placement makes a room feel larger, calmer, and easier to live in. The goal is simple: create clear walking paths, comfortable conversation zones, and practical access to storage, windows, and doors—without overcrowding. Below are the core layout rules that help living rooms, bedrooms, dining areas, and multipurpose spaces function better, plus a practical way to turn those rules into a finished plan.
What “good flow” looks like in a room
“Flow” is how naturally a room supports everyday movement and routines. When it’s working, people don’t hesitate at tight corners, and the room feels organized even before any styling.
- Walking paths feel obvious: you can move from doorway to doorway without weaving around furniture edges.
- Seating feels connected: chairs and sofas face each other enough to support conversation without shouting across a gap.
- Every major piece has a purpose: seating for people, tables for landing zones, storage for clutter control, lighting for task and mood.
- Visual balance is intentional: the room doesn’t feel heavier on one side, and the focal point (TV, fireplace, view, or art wall) is supported rather than blocked.
- Daily-use areas stay accessible: drawers open, closet doors swing, and dining chairs pull out without collisions.
Start with constraints: measure, map, and mark problem zones
Before moving anything, treat the room like a simple map. This prevents the common “it looked smaller online” problem and helps you avoid layouts that only work when nobody opens a door.
- Measure the room: wall lengths, and ceiling height if you’re considering tall shelving.
- Mark fixed elements: doors (with swing arcs), windows, radiators/vents, built-ins, fireplaces, and outlets that affect lamp/TV placement.
- Identify “no-furniture” zones: main doorways, emergency egress paths, and areas needed for door clearance or frequent access.
- Decide what the room must do: lounging, TV viewing, homework, hosting, reading corner, workout space, or storage needs.
Quick layout checkpoints by room type
| Room | Primary goal | Common mistake | Simple fix |
|---|---|---|---|
| Living room | Comfortable seating + clear paths | Pushing all seating against walls | Float seating on a rug and anchor with a coffee table |
| Bedroom | Rest + easy access to storage | Blocking closet or dresser drawers | Leave clear drawer/door space; choose slimmer nightstands |
| Dining area | Seating that’s easy to use | Table too large for the footprint | Downsize table or switch to an extendable style |
| Home office corner | Focus + cable access | Glare from window or poor lighting | Rotate desk or add task lighting and shades |
| Small studio/multipurpose | Zones without clutter | No boundaries between activities | Use a rug, shelf, or console table to define zones |
Choose a focal point, then build the layout around it
Most rooms feel more “settled” when the layout clearly supports one anchor. That anchor can be a TV wall, fireplace, a picture window, or even a statement bookcase.
- Pick the focal point: choose the feature you want people to notice first.
- Position the largest anchor first: sofa in a living room, bed in a bedroom, table in a dining area.
- Aim seating toward the focal point: keep conversation natural by angling chairs inward rather than lining them up like a waiting room.
- Avoid blocking: keep tall pieces away from low-window views, and avoid placing a sofa back directly in a main entry path when possible.
- Use lighting to reinforce the focal area: a floor lamp near a reading seat, table lamps flanking a sofa, or a pendant centered over dining.
Create zones in open layouts without adding walls
Open-concept rooms work best when each function has a boundary you can feel, even if there’s no physical divider. Think “clear areas with clear entrances,” not “everything everywhere.”
Spacing basics that prevent a cramped feel
Clearance is comfort. While exact numbers vary by room and household needs, established planning guidance emphasizes protecting pathways and “use zones” (like chair pull-out areas and door swings). For general clearance concepts, see the National Kitchen & Bath Association (NKBA) planning guidelines and accessibility principles in the ADA guidelines overview.
Room-by-room placement strategies
Living room
Bedroom
Dining
Entry area
Multipurpose room
A practical tool for planning: the Furniture Placement Basics eBook (digital download)
If measuring and imagining feels harder than it should, a step-by-step method can speed up decisions and reduce “move it again” fatigue. The Furniture Placement Basics eBook (digital download) is designed to turn broad rules into a repeatable process for arranging real rooms, including awkward corners and mixed-use spaces.
For homes where storage and “drop zones” are the real pain point, pairing layout improvements with a systems approach can help. The A Simple System for an Organized Pantry – 10 in 1 Bundle of Guides, eBooks & Checklists can complement room planning by making daily-use storage simpler to maintain.
Common layout problems and fast fixes
FAQ
What is the first step to arranging furniture in a new room?
Measure the room and mark doors, windows, vents, and outlets, then decide the room’s main purpose. Place the largest anchor piece first so everything else can align to it.
How can a small room feel bigger without buying new furniture?
Improve circulation paths, remove extra pieces, and define one clear zone with a correctly sized rug. Keeping vertical storage tidy and floating key furniture slightly off the walls (when possible) can also reduce the cramped feeling.
Is a digital furniture placement guide useful if the room has an awkward layout?
Yes—step-by-step methods make it easier to test multiple options, work around fixed elements, and compare layouts based on flow, function, and balance. That structure helps you choose a setup that works in real life, not just in a quick visual mockup.











Leave a comment